For the complete documentation index, see llms.txt. This page is also available as Markdown.

Adding regex-based types

Required global permission - either:

  • Create custom entity types

  • Edit any custom entity type

A regex-based custom entity type uses one or more regular expressions to identify values of that type. If a value matches a configured regular expression for the custom entity type, then it is identified as that entity type.

Regex-based custom entity types are useful when the entity values have a standard format. For example, to detect an identifier that is specific to your organization, and that always uses the same format, you could create a regex-based custom entity type.

For a more varied set of values that does not conform to one or a few formats, and that rely more on context, you would instead create a model-based custom entity type.

Creating, editing, and deleting a regex-based custom entity type

Creating a regex-based custom entity type

Required global permission: Create custom entity types

To create a regex-based custom entity type:

  1. On the Additional Entity Types page, click Add Custom Entity Type.

  2. On the Add Custom Entity Type panel, click Regex-based, then click Next.

Panel to select the type of custom entity type to create

After you configure the entity type:

Details panel for a regex-based custom entity type
  • To save the new type, but not scan dataset files for the new type, click Save Without Scanning Files.

  • To both save the new type and scan for it, click Save and Scan Files.

To detect new custom entity types in a dataset, Textual needs to run a scan. If you do not run the scan when you save the custom entity type, then on the dataset details page, you are prompted to run a scan.

Editing a regex-based custom entity type

Required global permission: You can edit any custom entity type that you create.

Users with the global permission Edit any custom entity type can edit any custom entity type.

To edit a custom entity type, in the regex-based entity types list, click the edit icon for the entity type.

You can also edit a regex-based custom entity type from the dataset details page.

For an existing entity type, you can change the description, the regular expressions, and the enabled datasets.

You cannot change the entity type name, which is used to produce the identifier to use to configure the entity type handling from the SDK.

After you update the configuration:

  • To save the changes, but not scan dataset files based on the updated configuration, click Save Without Scanning Files.

  • To both save the new type and scan based on the updated configuration, click Save and Scan Files.

To reflect the changes to custom entity types in a dataset, Textual needs to run a scan. If you do not run the scan when you save the changes, then on the dataset details page, you are prompted to run a scan.

Deleting a regex-based custom entity type

You cannot delete a custom entity type that is active in a dataset.

To delete a custom entity type:

  1. In the custom entity types list, click the delete icon for the entity type.

  2. On the confirmation panel, click Delete Entity Type.

Setting the name and description

In the Name field, provide a name for the entity type. Each custom entity type name:

  • Must be unique within an organization.

  • Can only contain alphanumeric characters and spaces. Custom entity type names cannot contain punctuation or other special characters.

After you save the entity type, you cannot change the name. Textual uses the name as the basis for the identifier that you use to refer to the entity type in the SDK.

In the Description field, provide a longer description of the custom entity type.

Configuring the regular expressions to use to identify matching values

Adding regular expressions manually

Under Keywords, Phrases, or Regexes, provide expressions to identify matching values for the entity type.

Regular expressions list for a custom entity type

An entry can be as simple as a single word or phrase, or you can provide a more complex regular expression to identify the values.

Textual maintains an empty row at the bottom of the list. When you type an expression into the last row, Textual adds a new empty row.

To add an entry, begin to type the value in the empty row.

To edit an entry, click the entry field, then edit the value.

Using AI Assist to generate the regular expressions

You can use the AI assist option to have an LLM generate regular expressions for you based on the entity type description.

  1. Click AI assist.

  2. In the prompt field, provide a description of the values that you want to detect.

Prompt to use AI to generate the regular expressions
  1. To have the LLM use example text from the test panel to help generate the expressions, check Use sample text from the test panel.

  2. Click Generate.

The LLM analyzes your request and then generates suggested regular expressions.

Regular expressions generated by AI assist based on the prompt
Review the expressions, then:

  • To add the expressions to the list of expressions, click Insert.

  • To replace all of the current expressions with the generated expressions, click Replace all.

Removing regular expressions

To remove a regular expression, click its delete icon.

Testing an expression from the list

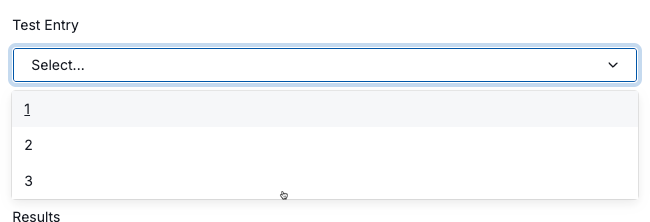
Under Test Entry, you can check whether Textual correctly identifies a value as the entity type based on the provided expression.

To test an expression:

  1. From the dropdown list, select the entry to test.

Dropdown list to select the regular expression to test
  1. In the text area, provide the text to test.

As you enter the text, Textual automatically scans the text for matches to the selected expression. The Result field displays the input text and highlights the matching values.

Test results for a custom entity type regular expression

Enabling the regex-based entity type for datasets and guided redaction projects

On the entity type details panel, under Activate Custom Entity Type, you identify the datasets and guided redaction projects to make the entity active for.

You can also enable the entity type:

Activate Custom Entity Type section to select the datasets and guided redaction projects that include the custom entity type

To make the entity active for all current and future datasets and guided redaction projects, check Automatically activate for all current, and new datasets and guided redaction projects.

The rest of the panel is split into separate lists for datasets and guided redaction projects.

For each list:

  • To make the entity active for a specific dataset or guided redaction project, set the toggle for the dataset or project to the on position.

  • To filter the list based on the dataset or project name, in the filter field for the list, begin to type text from the name. Textual updates the list to only include matching datasets or projects.

  • To update all of the currently displayed datasets or projects, click Bulk action, then click Enable or Disable.

Last updated

Was this helpful?